Setup Wizard
The setup wizard provides a guided, visual way to configure Vidra. It launches automatically on first run when no configuration exists.
Starting the Wizard
git clone https://github.com/yosefgamble/athena.git vidra
cd vidra
docker compose up --build
Open http://localhost:8080 in your browser. If no .env file exists (or SETUP_COMPLETED=false), the wizard starts automatically.
Step 1: Welcome
The welcome screen detects your system resources and presents two paths:
- Quick Install — Docker-managed setup with sensible defaults (recommended for most users)
- Advanced Setup — Step-by-step configuration for custom infrastructure
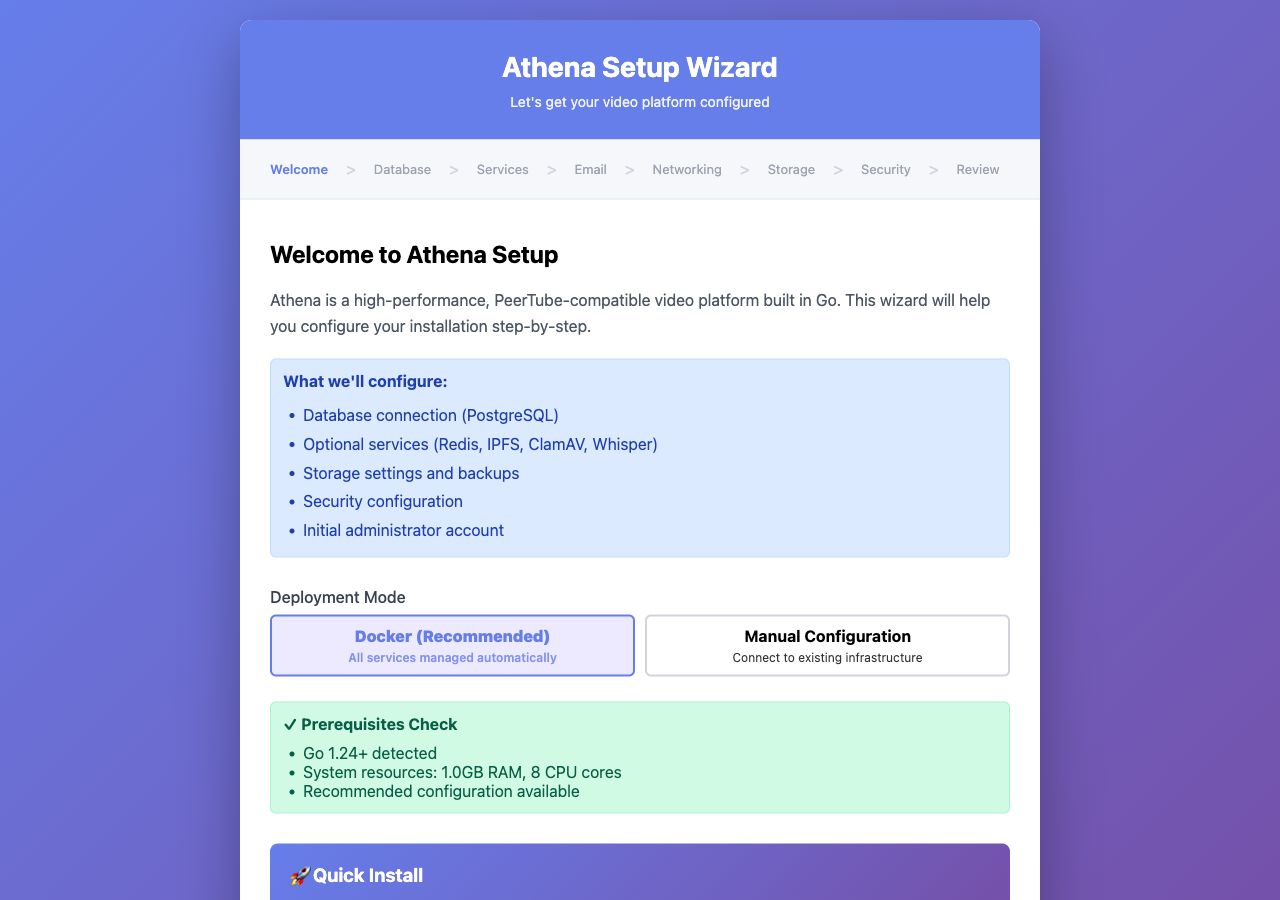
The prerequisites check verifies Go version, available RAM, and CPU cores, then recommends which optional services your system can support.
Quick Install Path
For the fastest setup, click Quick Install (Docker). This path only requires:
- Admin username, email, and password
- Domain/hostname
Everything else (PostgreSQL, Redis, IPFS, email) is auto-configured with Docker containers.

If you want more control, click Continue for the advanced setup described below.
Step 2: Database Configuration
Choose how PostgreSQL is provisioned:
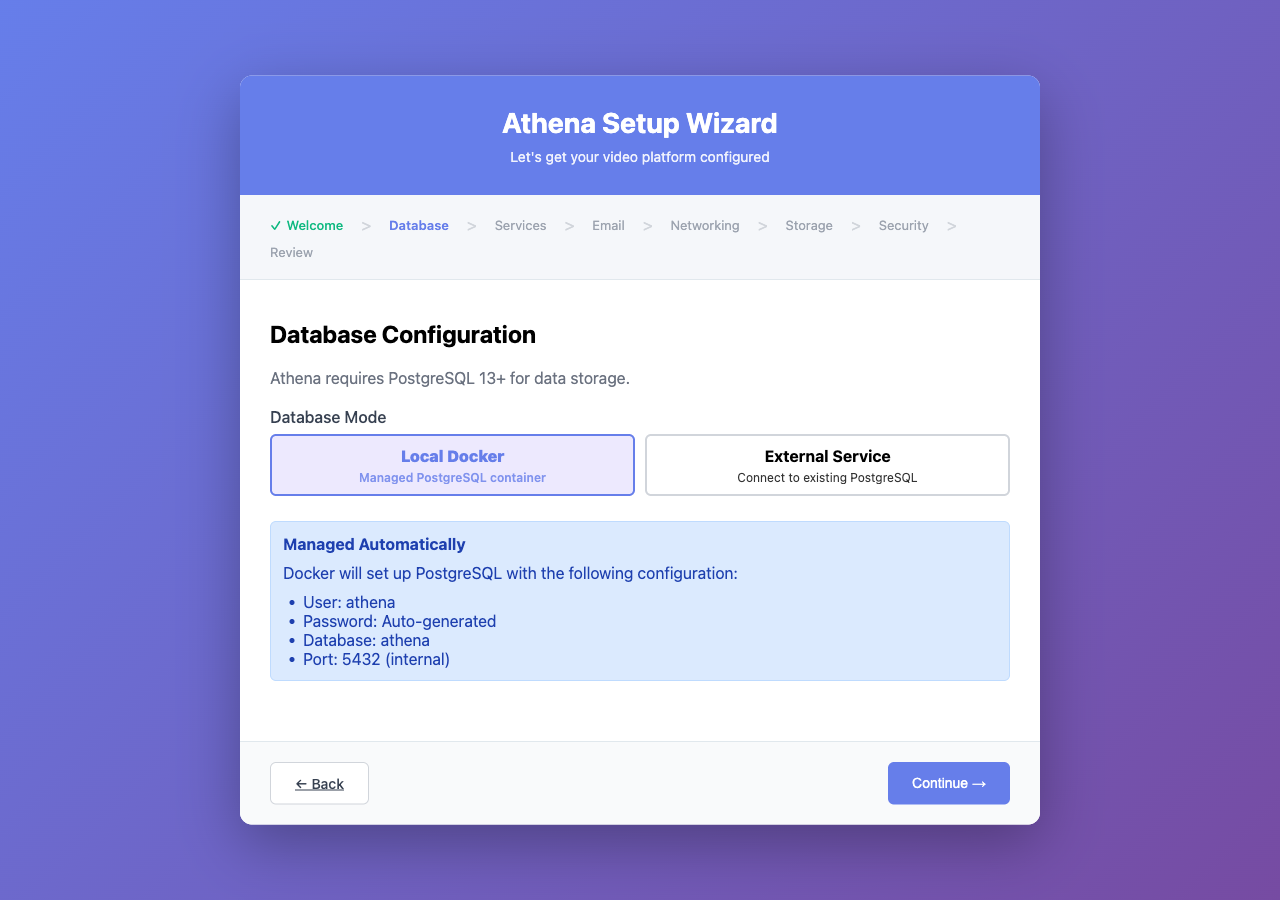
Local Docker (Recommended)
No configuration needed. Docker manages PostgreSQL automatically with:
- User:
athena - Password: Auto-generated
- Database:
athena - Port:
5432(internal)
External Service
Connect to an existing PostgreSQL instance by providing:
| Field | Example | Required |
|---|---|---|
| Host | db.example.com | Yes |
| Port | 5432 | Yes |
| User | vidra | Yes |
| Password | •••••••• | Yes |
| Database Name | vidra | No (default: athena) |
| SSL Mode | require | No (default: disable) |
Use the Test Connection button to verify connectivity before proceeding.
Step 3: Services Configuration
Configure required and optional services:
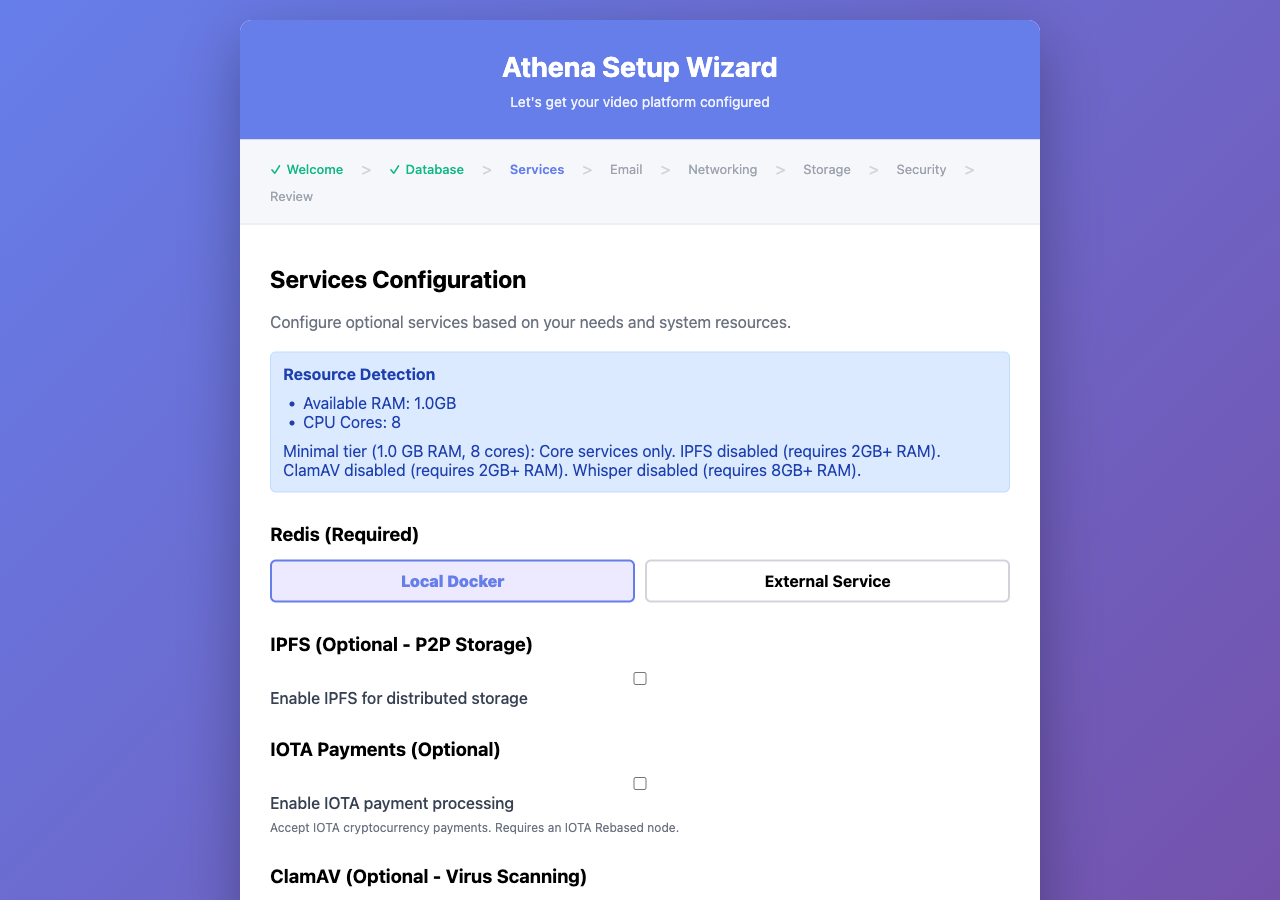
Redis (Required)
- Local Docker — Auto-managed, no configuration needed
- External Service — Provide a Redis URL (e.g.,
redis://cache.example.com:6379/0)
Optional Services
| Service | RAM Requirement | Purpose |
|---|---|---|
| IPFS | 2 GB+ | Distributed P2P storage |
| IOTA Payments | — | Cryptocurrency payments |
| ClamAV | 2 GB+ | Virus scanning on uploads |
| Whisper | 4 GB+ (GPU recommended) | Automatic video captions |
The wizard's resource detection panel recommends which services your system can support based on available RAM and CPU cores.
Step 4: Email Configuration
Configure how Vidra sends emails for verification, password resets, and notifications:
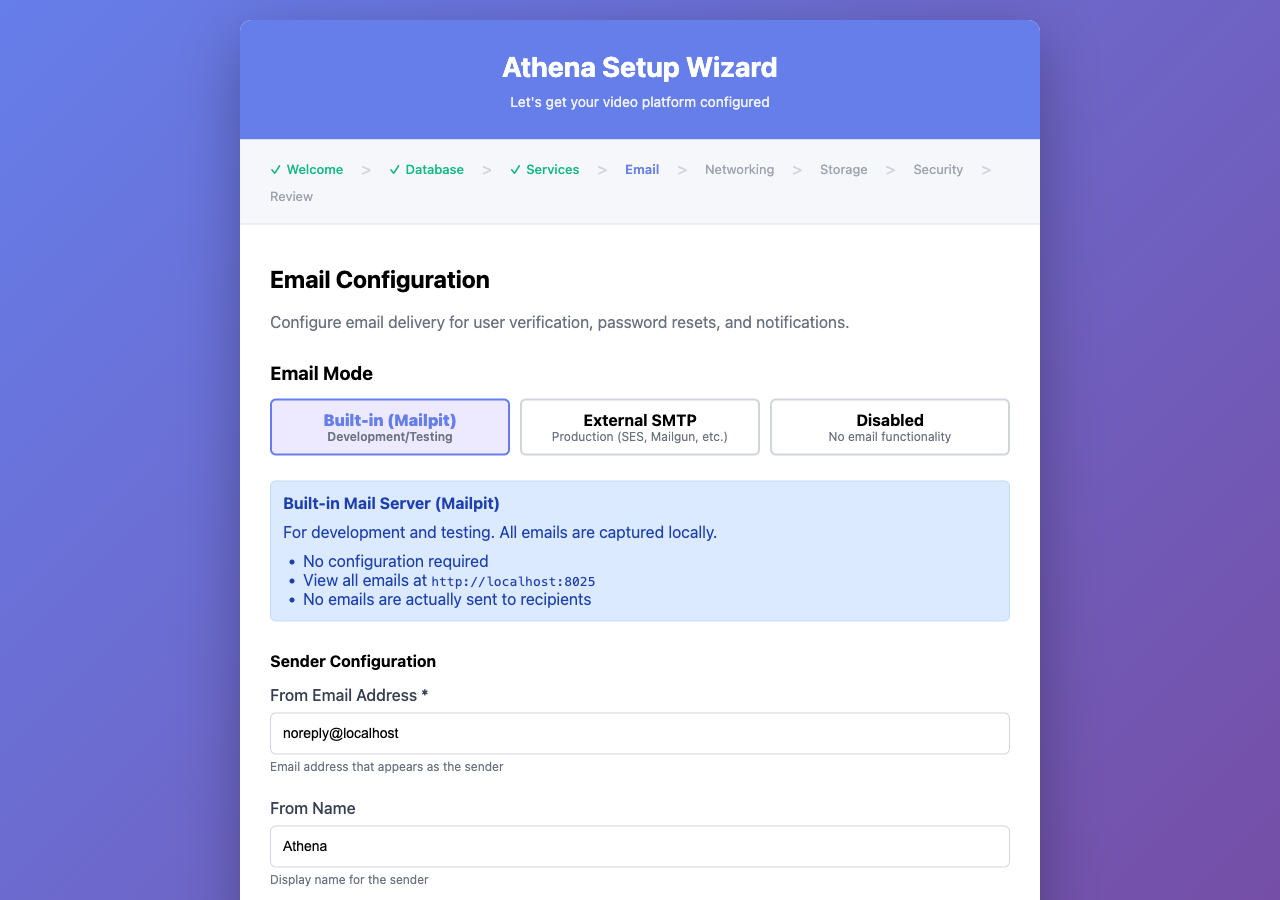
Built-in (Mailpit) — Development
All emails are captured locally. View them at http://localhost:8025. No emails are actually delivered to recipients. Ideal for development and testing.
External SMTP — Production
| Field | Example | Required |
|---|---|---|
| SMTP Host | smtp.mailgun.org | Yes |
| SMTP Port | 587 | Yes |
| Username | postmaster@mg.example.com | No |
| Password | •••••••• | No |
| From Address | noreply@vidra.example.com | Yes |
| From Name | Vidra | No |
Use the Send Test Email button to verify your SMTP configuration.
Disabled
No email functionality. Users cannot verify email addresses, reset passwords, or receive notifications. Not recommended for production.
Step 5: Networking
Configure how Vidra is accessed:
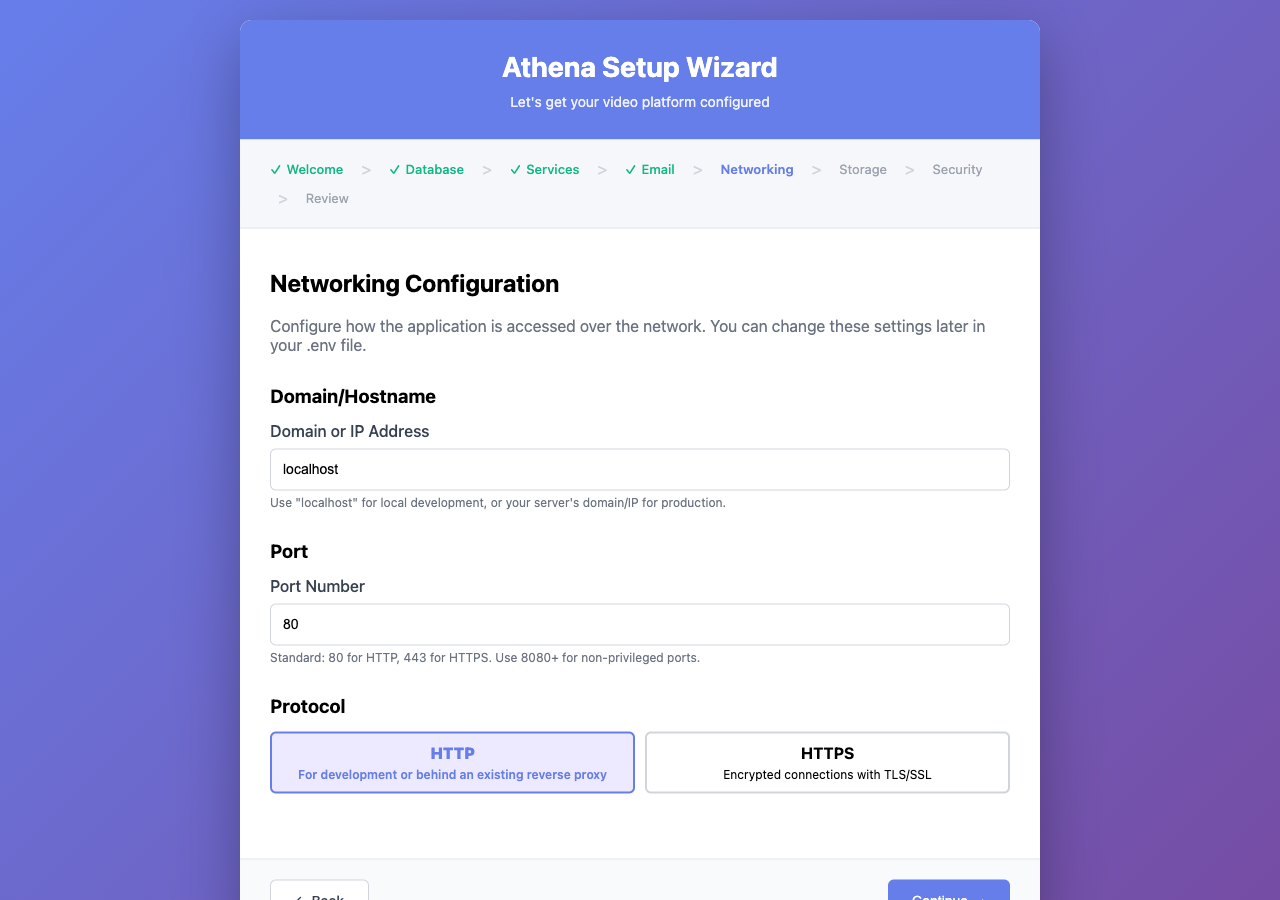
| Field | Default | Description |
|---|---|---|
| Domain/Hostname | localhost | Your server's domain or IP |
| Port | 80 | HTTP port (443 for HTTPS, 8080+ for non-privileged) |
| Protocol | HTTP | Choose HTTPS for production |
TLS/SSL (HTTPS only)
- Self-Signed — Quick setup, browser will show a warning
- Let's Encrypt — Free, automatic certificates (requires a real domain, not localhost)
Step 6: Storage
Configure where uploaded videos and backups are stored:

| Field | Default | Description |
|---|---|---|
| Storage Path | ./data/storage | Directory for uploaded videos |
| Enable Backups | Yes | Automated database and config backups |
| Backup Target | Local | Local, S3, or SFTP |
| Schedule | Daily (2 AM) | When backups run |
| Retention | 7 days | How long to keep backups |
Step 7: Security
Set up authentication secrets and the initial admin account:
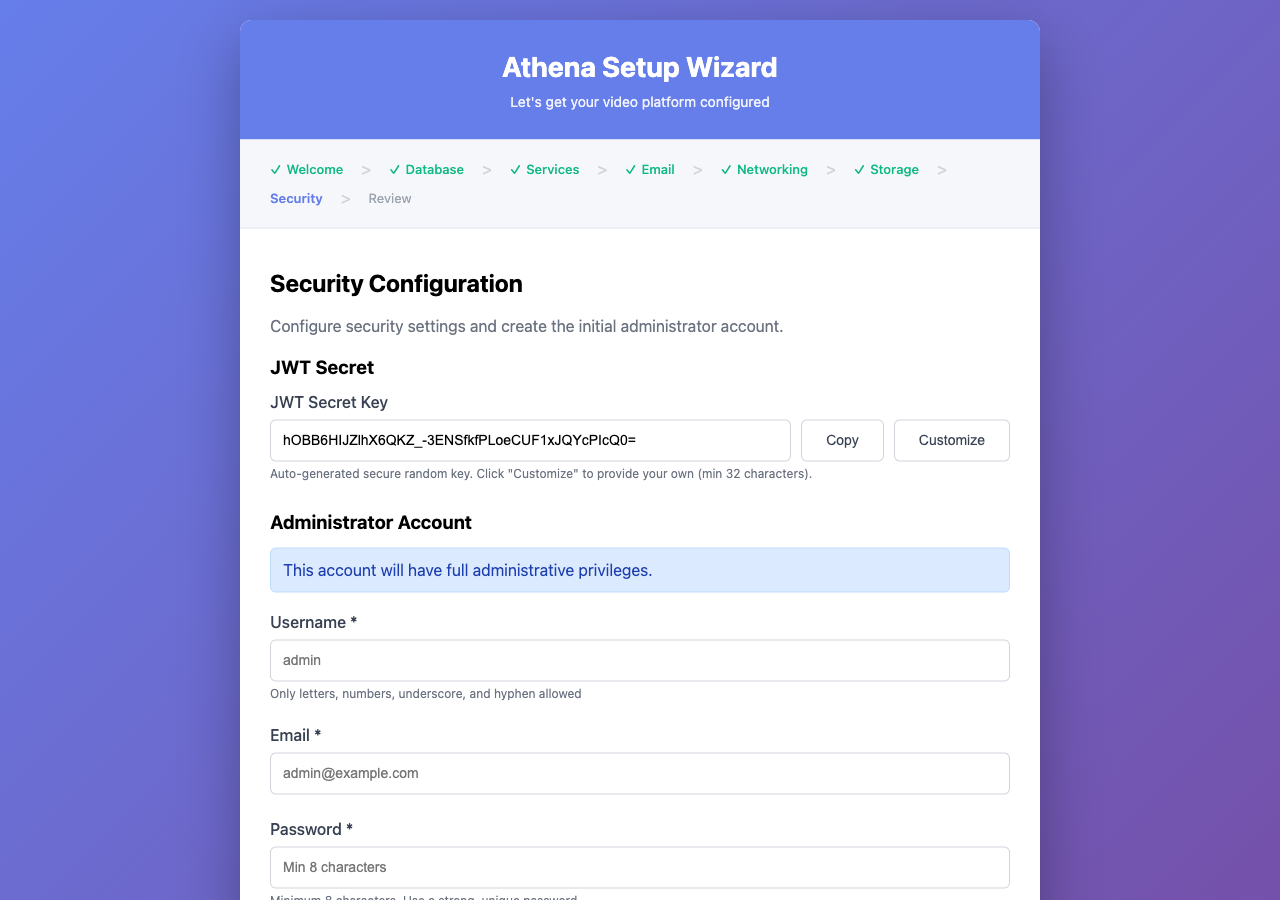
JWT Secret
A 32-character secure random key is auto-generated. You can click Customize to provide your own (minimum 32 characters).
Store the JWT secret securely. Changing it later will invalidate all existing sessions.
Administrator Account
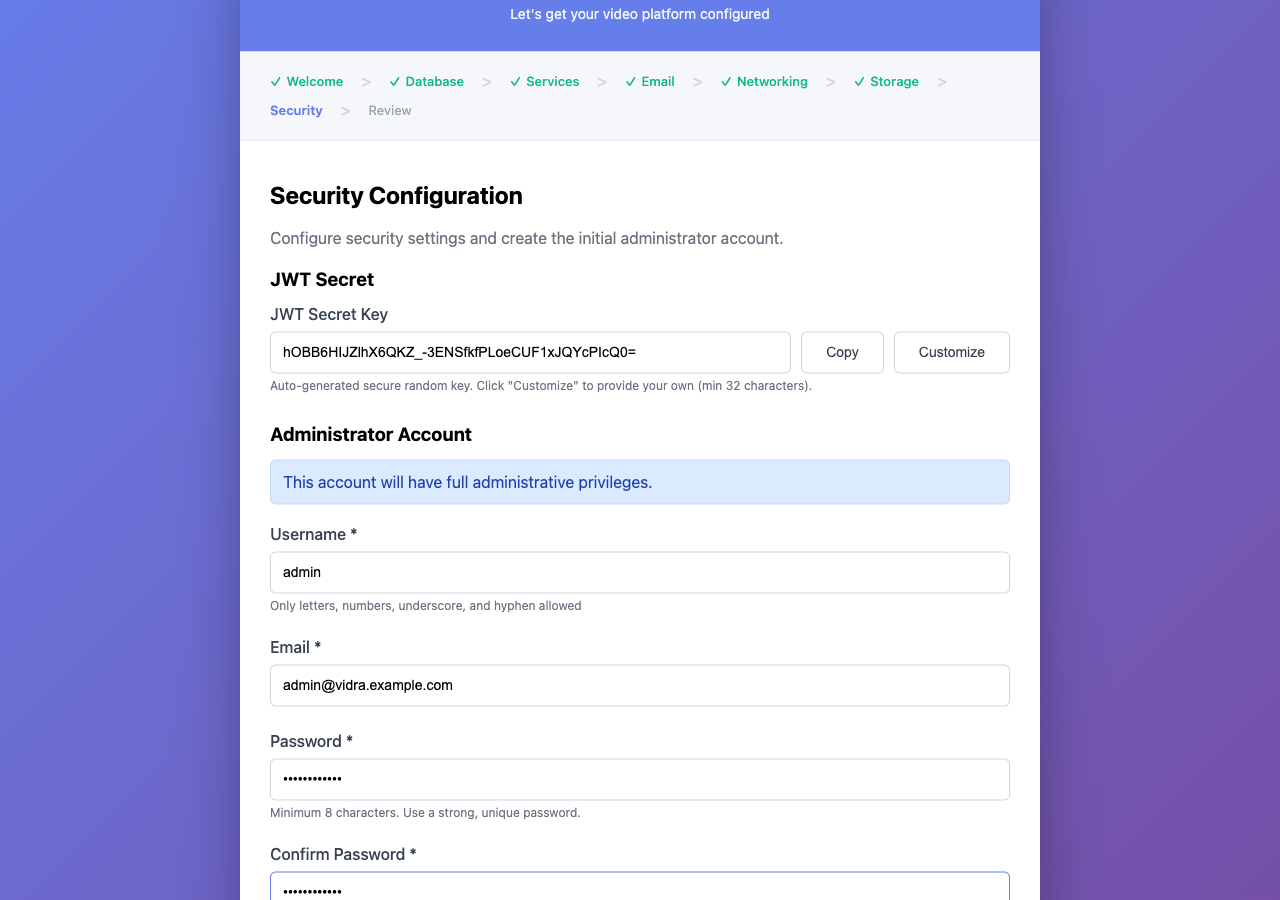
| Field | Requirements |
|---|---|
| Username | Letters, numbers, underscore, hyphen only |
| Valid email address | |
| Password | Minimum 8 characters |
This account has full administrative privileges over the Vidra instance.
Step 8: Review & Apply
Review all your configuration before applying:
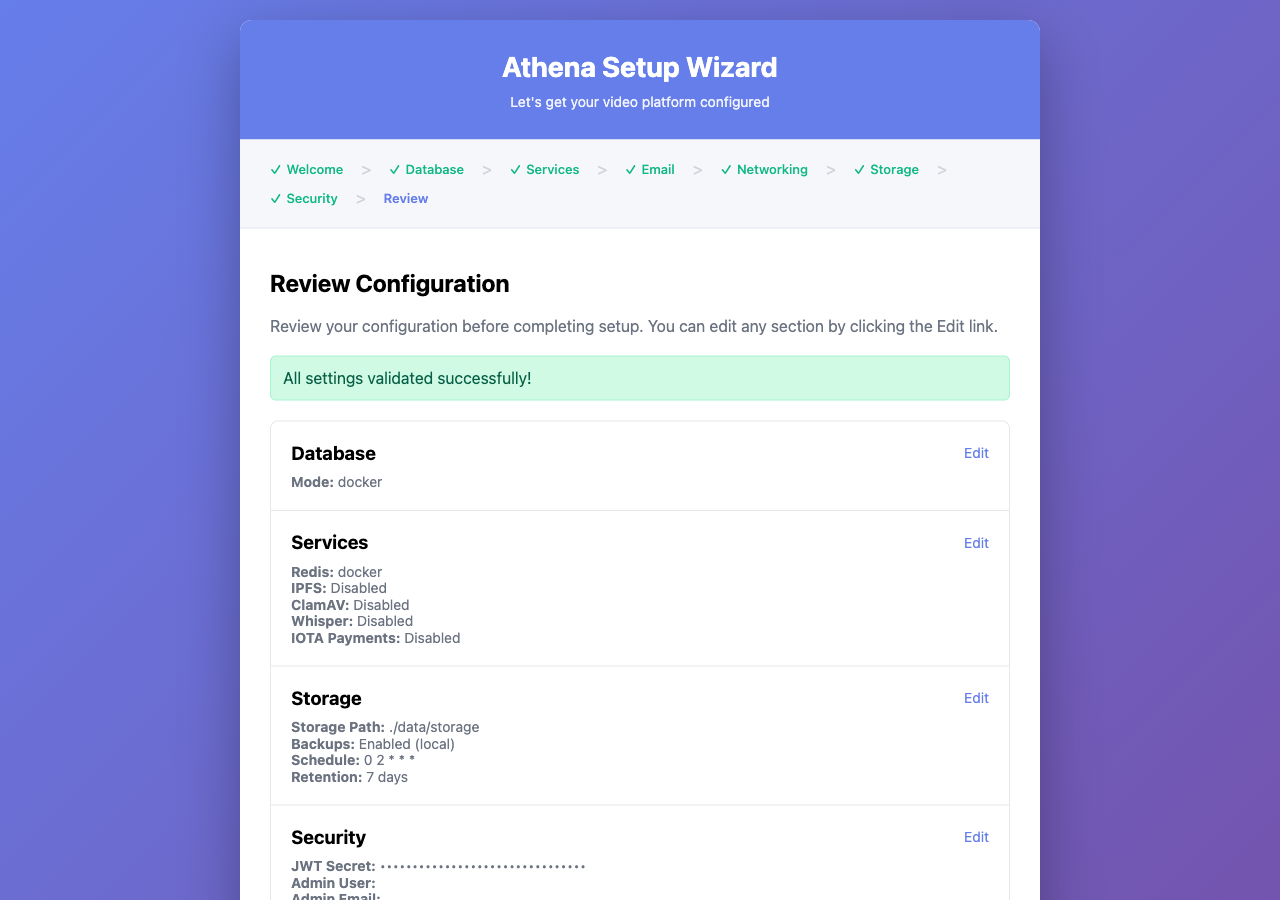
The review page shows a summary of every setting. Click Edit next to any section to go back and make changes.
When you click Complete Setup, the wizard:
- Creates the database (if using external PostgreSQL with "Create DB" enabled)
- Creates the admin user
- Generates the nginx reverse proxy configuration
- Writes
docker-compose.override.ymlwith your service selections - Writes the
.envfile with all configuration - Sets
SETUP_COMPLETED=true
After completion, the server restarts and redirects to the main application. Log in with your admin credentials.
Post-Setup
After the wizard completes:
# Verify the server is running
curl http://localhost:8080/api/v1/config

# Check service health
curl http://localhost:8080/health

# View logs
docker compose logs -f
Your .env file contains all configuration. Back it up — it contains secrets including the JWT key and database credentials.
To re-run the wizard, set SETUP_COMPLETED=false in your .env file and restart the server.